Category Archives: Woodturning

Air Quality PM2.5

I was concerned about air quality during sanding of my wooden projects. I use N-95 respirators and HEPA air purifies for safety but I couldn’t quantify the air quality to see if my safety measures are adequate or not. Eventually measuring air quality became a topic of interest. Let me share my findings.
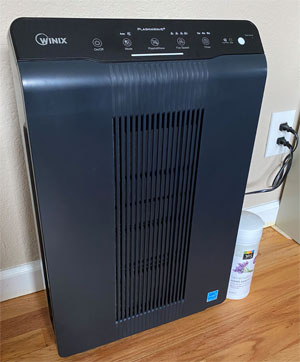
Winix HEPA Air Purifier on a floor

In addition to using a Festool dust extractor I have one of these Winix air purifiers near my wood sanding place. I noticed that it catches not only fine wooden particles but also some dust.

While cleaning the filters according the manufacturer instructions I was glad to learn that the caught dust ended up in the filters and not in the lungs so I placed quite a few of those HEPA air purifiers around my house.

This particular Winix model is two feet high (60 cm) and comes with a remote.
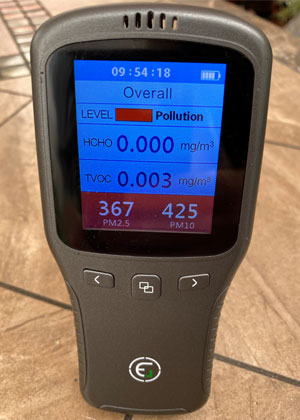
EG Air Quality Sensor showing PM2.5 = 367 and PM10 = 425

I also got an air quality monitor that measures fine particulate matter (PM, <2.5 microns in size — PM2.5) as well as formaldehyde, and TVOC (total volatile organic compound).

This particular model shows PM measurements using mg/m3 concentrations. The included instruction provides the PM2.5 Level Interpretation table based on the EPA standards.

The reported values in mg/m3 may be different from the “Air Quality Index” that may be calculated differently.

I found that HEPA filters help with smoke too: the current outdoor air quality in California is pretty bad due to the fires caused by recent thunderstorm and lightning. The outdoor air quality index reached “Very Unhealthy” and even “Hazardous” levels in September 2020. Even though doors and windows are shut closed in my house smoke traces still find a way inside especially during windy days. I noticed that having the indoor air purifiers running 24 x 7 keep the indoor air quality index almost always 1.
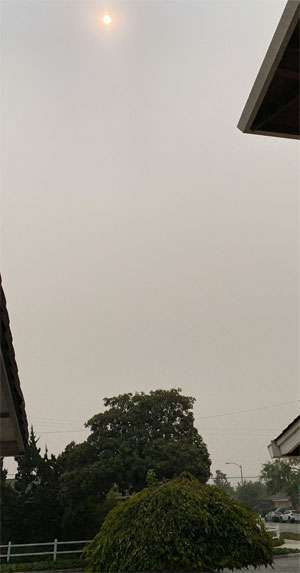
During windy and heavy smoke pollution days when the outdoor air quality index raises above 200, thanks to my air purifiers, the indoor air quality index never raises more than 5-7 which is still considered “good”.

The Sun is barely shining through the smoky air at 1:00 PM on 11 September 2020. Location: San Jose, CA.

Dust particles in the air are very small but they still differ in size greatly. Measuring a number of particles of 2.5 and 10 micrometers is a standard practice but other sizes of particles can be measured too by using a particulate concentration sensor designed by relying on the laser scattering method. Such sensors are capable of continuous acquisition and computing the number of suspended particles in per unit volume which is also the particulate concentration distribution.
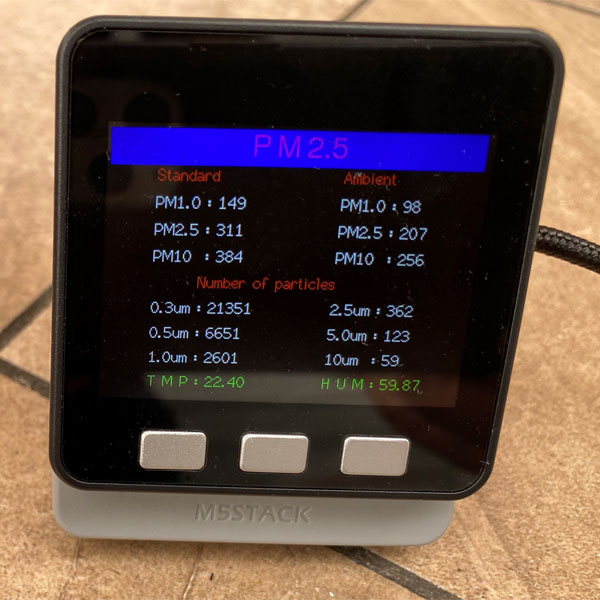
Device shows count of particles of different sizes
M5Stack PM2.5 Air Quality Kit shows particle count of 6 different sizes. The device is 2 x 2″ (5 x 5 cm).

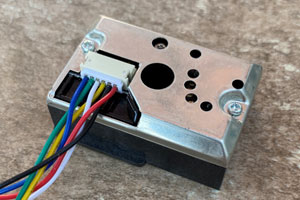
I got a M5Stack PM2.5 Air Quality Kit that is based on the ESP32 micro-controller and a sensor (PMSA003) from Plantower. This device can measure 0.3, 0.5, 1.0, 2.5, 5, and 10 microns (micro meters). It can be used to monitor the air quality as is or can be programmed using Arduino (or other platforms) to extend its functionality.

Some other sensors are available for DIY integrations with various micro-controllers.

Equipped with this knowledge, sensors, and air purifiers I can quantify the air quality and make decisions to reduce my family exposure to harmful PM air pollutants. Measuring air quality with my own sensors on demand allows me to get more accurate and more up to date readings compared to weather apps and online websites that show air quality data; also it gives me flexibility of measuring and comparing the air quality indoor, in the garage, and outside.

I think it is important to be mindful about indoor/outdoor air quality, to avoid going outside during bad days, and to ventilate homes during good days. Stay safe. Search about air pollution online to learn more about the topic. I would recommend starting with this article: Why is PM2.5 often higher than PM10?
Embellishment

Let me share my favorite embellishment technique with you:

Woodburning tip: Skew

I like using a wood burning tool to outline the pattern borders before coloring. That helps me to achieve two things:

  • Emphasize perimeter lines by making them dark/black. Accenting coloring with black lines is a popular technique that some painting artists use (especially water-color and pastel painters).
  • Prevent paint bleeding across the borders. Outlining with a wood-burning tool works similar to scoring borders with a sharp knife. The idea is to cut/separate wood fibers so the paint does not bleed across the borders.

Strawberry Bowl

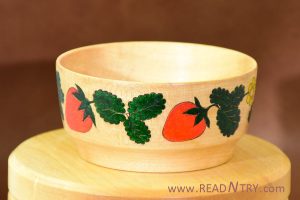
The “Strawberry Bowl” project was turned from basswood and embellished using the described technique. The bowl is 4” (10 cm). It was painted using felt-tip markers. The finish is acrylic spray.

The markers are very bright and fit the Christmas season very well. Other seasons I like using acrylic paint (heavily diluted with water): it is much easier to handle and it may look bright or soft as needed. I apply at least two coats of diluted acrylic paint to achieve better color-particle distribution that is thin enough to keep the wood grain still visible through.

Turned Bells

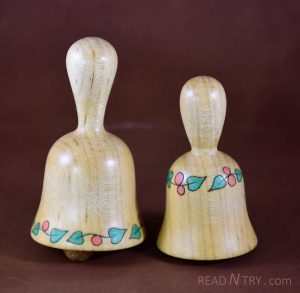
These bells were turned from maple and were embellished with diluted acrylics and finished with Tung oil. You may see the grain through the painted leafs. The pieces of maple wood were almost white but after applying oil it darkened the wood a little and exposed the before-non-visible grain.

The embellishment ornaments were drawn, burned, and painted freehand (no stencils used). It required a steady hand, time, and magnifying glasses. Using good paint brushes helps a lot.

Happy Carving & Turning,
Roman

Turning Little Things

Let me share my little wood turning projects that I enjoyed doing recently. The size of the pieces is about two inches (5 cm) or so.

Igloo

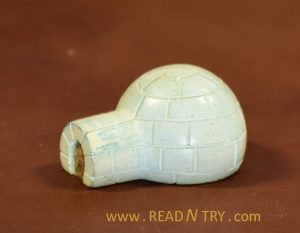
I turned this little igloo from basswood. I chose basswood because it is easy to carve. I used a V-tool to carve the “snow brick” pattern. This Wikipeida article helped me to understand how an igloo is constructed. According to the article I carved the brick grooves as a spiral.

Turning Igloo

When it was turned it looked like a sphere attached to a cylinder; I cut away some wood parallel to the turning axes to form the base and to achieve the igloo shape.

Painting igloo was a real challenge: painting snow is not easy. I used multiple coats of acrylic paint mostly white and some blue. I used some glitter to get sparkles but didn’t like the effect: you may see some dark dots on the picture — the glitter reflects light as expected but also causes dark dots on the light background.

Bells

These bells are turned from maple. The smaller bell is 2 inches (5 cm) high.

Turned Bells

I embellished the bells with the ornament using a small skew wood burner tip and acrylic paint.

I like turning maple because it is easy to turn. Maple is closed grain wood so it is easy polish. I finished the bells with with three coats of linseed oil.

I used silver wire to attached clappers. These wooden bells do produce sounds though not as strong as metal bells.

Lighthouse

I wanted to carve a lighthouse for some reasons. One of them is that I think it is a very cool project to carve. I searched for lighthouse pictures online and, surprisingly, could not find the real one that I very like. I think most lighthouses were designed to be practical, withstand severe winds and waves; so prettiness was not a consideration.

Online pictures still helped me a lot to be inspired and to pick the parts of the design from different real lighthouses that I liked. I came up with a lighthouse wood carving pattern that I will share below for you to see and download. I built three lighthouses using this pattern so far.

Lighthouse #1

I turned the lighthouse on a lathe and manually carved the top, windows and the door. I drilled the piloting holes to make it easier to carve the area under the roof.

Lighthouse

Carving the lighthouse cabin

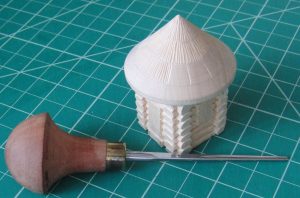
Carving the lighthouse cabin was a challenge too due to a number of small details. This affordable housing is only 1 square inch. 🙂 I turned the roof and used my whittling knife to shape the walls. I used my chip carving knife to carve every log of the house. I used a V-tool (pictured) to wood carve the grooves on the roof so it looks like an old hey roof.

The base and cypress trees were carved from basswood too.

I am proud that this project won second place in the “turning and carving” category in one of the carving shows in 2015.

Lighthouse on a Cliff

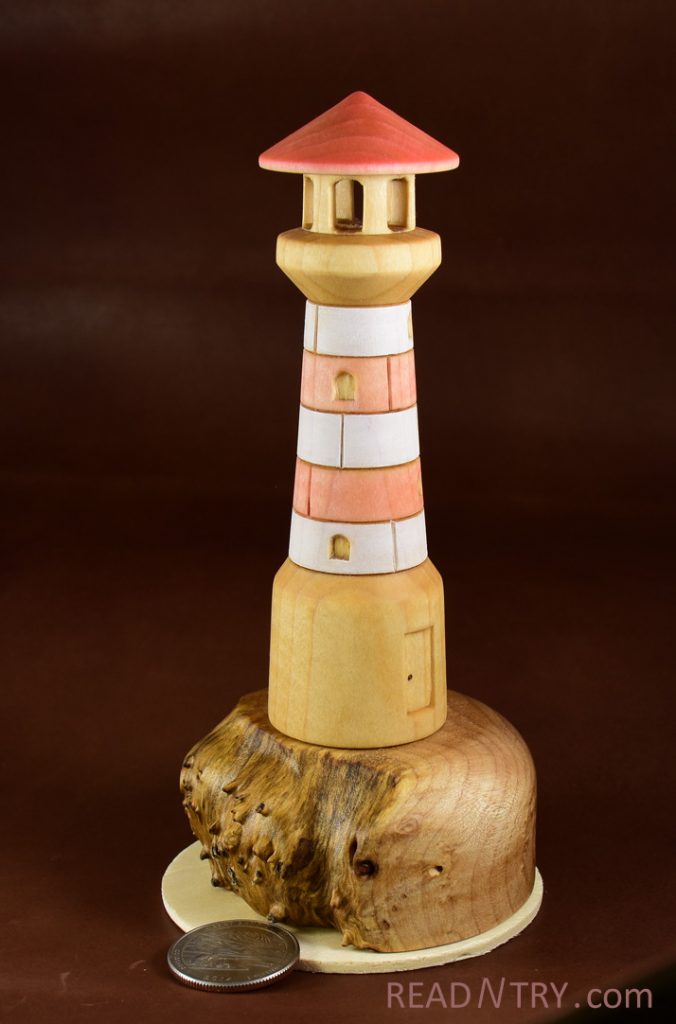
“Lighthouse on a cliff” — this is my second attempt to turn and carve a lighthouse from basswood in 2016. Height with the base is 6″ (15 cm). Base diameter is 3 inches (7 cm).

The base is turned from a maple burl while still exposing its natural surface. Lighthouses were often built on the rocks so, I think, the burl original look fits the project well — it reminds a rocky cliff. Click on the picture to zoom in.

I painted the lighthouse stripes and the roof using acrylic paint diluted with water. Diluted paint allows the wood grain still be visible through the light coat. To preserve the wood and to highlight the wood grain I finished the project with boiled linseed oil.

I made a couple of changes in the design compared to the first lighthouse: I made the roof a little larger. I also replaced the “bricks” in the middle with “blocks” to split the middle area into five red-white stripes instead of four. I like these changes.

Lighthouse #3

It is mostly done. I will update this section a little later.

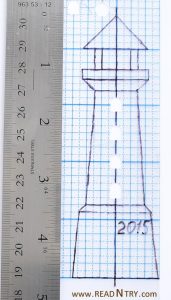
Lighthouse Pattern

Lighthouse Pattern

You may download the lighthouse carving pattern: click on the picture to enlarge it and use the “save image” feature of your browser.

Overall I enjoyed turning and carving these lighthouses from wood a lot! I think lighthouse is a great woodcarving project for carvers of all levels. Will see if I make more of them in the future.

Susan, Personal Assistant

Meet my personal assistant, Susan, which I built and programmed this year… to keep the trend of 2016 🙂 It is designed to handle up to 200 pounds (90 kg). I built that robot using maple, steel, copper and some other fifty elements mentioned in the periodic table. It is 5″ (13 cm) in diameter; height is 1.5″ (3.5 cm).

Personal Assistant

I call it Susan. My internet-connected personal assistant is not very smart — it does exactly what I want without any chance of spying on me — but I didn’t want to call it dumbwaiter. So, Susan it is. Unfortunately my round assistant turned out (yes, I used a lathe to turn the chassis) to be a little lazy but I call it a feature, not a bug.

My Internet-connected Lazy Susan can serve me food, show the time, display my wood carvings rotating them continuously, as well as other things. It can do whatever a stepper motor can do. Also it can stay perfectly still on the order or when the power is off and the built-in rechargeable battery gets empty. It can autonomously perform at full speed up to 2.5 hours on a full charge.

Under the hood

Inside of Lazy Susan

These pictures show “under the hood”. The micro USB cable is used for charging. The little hole in the base on the right picture is a hidden button to turn it on/off.

I can control it using my iPhone (or any network-enabled device) with a simple HTML+JavaScript interface.

Components:

Lazy Susan Components

* Maple 0.75″ x 5.5″ x 12″ (2cm x 14cm x 30cm)
* Arduino LilyPad USB
* ESP8266 ESP-01 Serial WiFi Wireless Transceiver Module
* Lithium Ion Polymer Battery 3.7V 500mAh
* Stepper Motor
* Stepper Motor Uln2003 Driver Board
* Push-and-lock switch
* Lazy Susan Bearings, 3″ (7.5 cm)

I believe all the components cost me ~$60 including wood, screws and wires. The most expensive parts were the LilyPad USB and ESP8266 when I bought them for $25 and $14.50 in 2014. Now, in 2017, they are available for a lot less. With the current prices the component list, I believe, may cost $37.

I built this robot because I needed to make videos of small items from all sides by turning them around. I bought a readily available rotating base online, it worked OK, but I was not very happy with it: it turns only clockwise, it was a little noisy and slow (only 1 rpm) — it would make my videos too long. Also it must use a power cord all the time to perform. My Lazy Susan can operate without a charging cord for some time; that makes it more suitable for my photo sessions.

Rotating Bases

The project’s challenges:
* Arduino documentation was not exactly correct. It says that the SoftwareSerial on LilyPad USB works on all digital pins. It took me some time to figure out that only some PINs are suitable.
* I needed to connect the external “Charging/On” switch but the board does not provide any PINs for this use case. I ended up removing the built-in switch and soldering wires to the external switch very carefully.
* Sanding wood is always a challenge. It is important to use quality sand paper and go through every grit progressively to remove all tool marks and sanding scratches.

Lack of documentation for ESP8266 ESP-01 is not a challenge these days. I was able to start a simple webserver on the chip and it greatly simplified the setup. I would like to thank Igor Fonseca Albuquerque for his post: Wi-Fi Controlled FPV Rover Robot. It helped me to resolve some of my ESP8266 challenges.

Overall it was a very enjoyable little project. Literally, Susan helps quickly turning around any thing I need silently up to 4 rpm. I enjoyed building software to meet my own requirements.

Ok, Susan, let’s turn something up! Enjoy this short video:

UPDATE  2017-01:
I received many questions about the project. Here are the things I would suggest to keep in mind if you decide to build a similar project:
* Try to avoid using a WiFi module – it complicates the project unnecessary. Aside from the “cool factor” I have not found a use case yet for controlling the lazy Susan from far away. Having one or several buttons would be more reliable, secure and just simple.
* If your use case does not require a built-in battery it could simplify the design.
* Using the “Arduino LilyPad USB” micro-controller is actually overkill for this simple project. I used it because I have many of them lying around.
* The stepper motor I used is rated for 5V but the other electronic components work with 3.3V. That affects the motor torque. The max load the motor could turn with this design is only 2.5lb (1.1kg).
* I considered using a continuous rotation servo instead of a stepper motor. The control would be much more precise with the servo. The stepper motor won due to its quietness.
* The design can be applied to a small diameter lazy Susan. To support larger diameter it is better to use some kind of gears.

Another way to achieve similar functionality cost-effectively is to turn a fancy cover for a rotating base that is available in stores for about $10.

Thank you for all the questions.

Natural Edge Woodturning

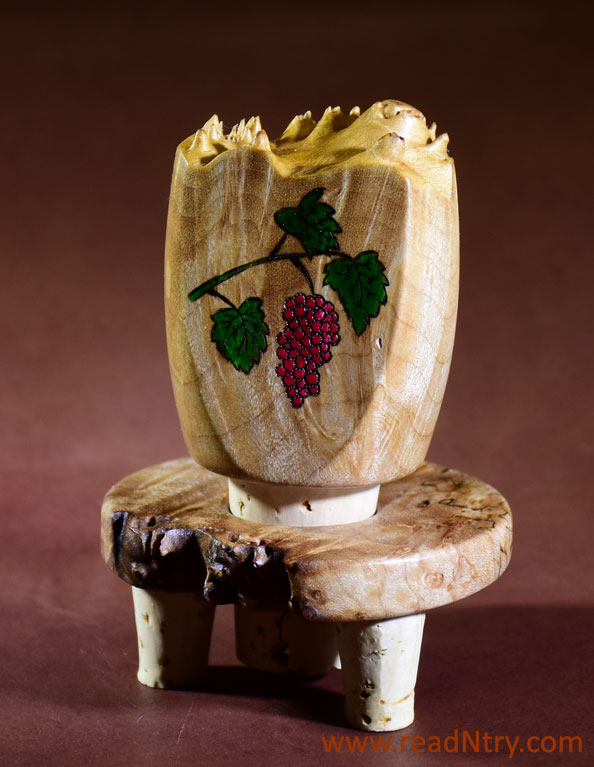
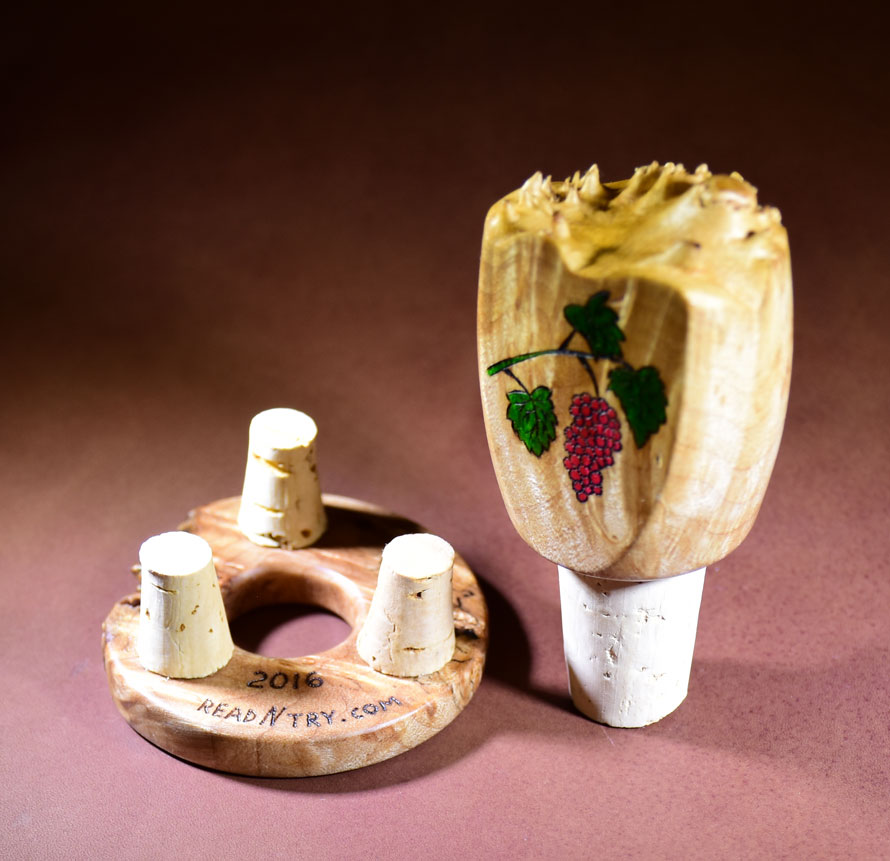
I turned this bottle stopper from the highly figured, lightly spalted, beautiful piece of maple burl that has some traces of previously larvae occupation. This piece goes to my friend, George, as my “thank you” for giving me an opportunity to work with such beautiful wood pieces.

Natural Edge Woodturning Project

Natural Edge Woodturning Project

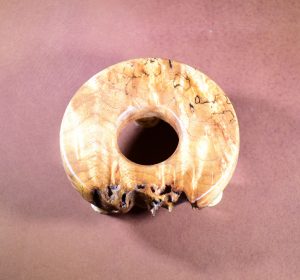
It was a challenge to keep the natural wood surface undamaged during turning. You may see the natural burl surface on top of the bottle stopper and the side of the stand ring.

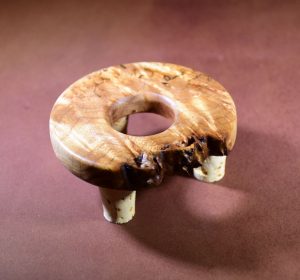
Bottle Stopper Stand

Bottle Stopper Stand

Bottle Stopper Holder

Bottle Stopper Holder

Finishing with oil was another major challenge –- needed to add just enough oil to highlight the wood grain but not over-saturate it. The piece turned out very well so you may see a nice balance between white and brown strokes and all shades in between.

I drew the vine branch freehand, burned the lines and painted it with color markers. I glued small cork plugs to the turned ring from another piece of maple burl to arrange the stand. Overall I enjoyed working on this project and I proud sharing it with you.

Bottle Stopper

Bottle Stopper