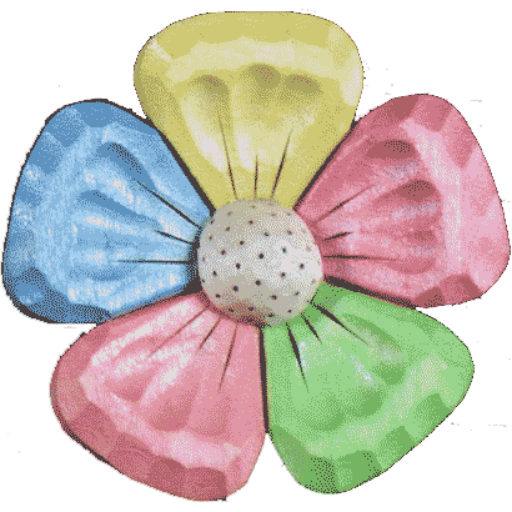
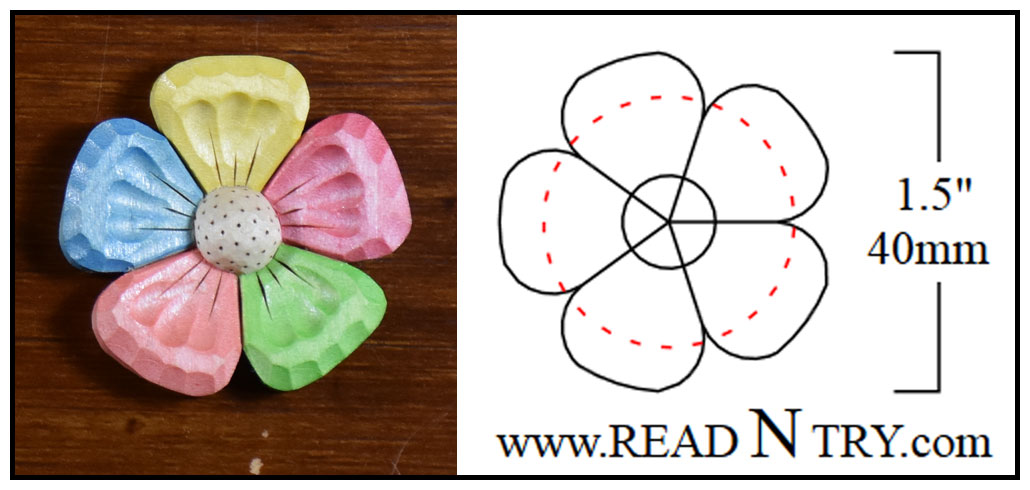
I enjoy carving flowers with 5 petals. They are 1.5 inches (4 cm) in diameter. I usually attach a small magnet or a pin to the back. These colorful carving flower magnets can be used on a fridge or a whiteboard. They make a great gift to family members, friends, coworkers, and sometimes even strangers who I find kind, helpful, or respected. If you got your flower and read this article drop me an email; without it, I would never reply and we may never meet again.

This project was inspired by a Russian tale, “Rainbow Flower” by Valentin Katayev; see details here in English or on Wikipedia in Russian. A child in the tale/movie gets a magic flower where each petal has a different color. Every petal can make any wish come true. It is a very kind story about meaningful and meaningless wishes. I wish (and try my best) that every person gets a colorful magic flower!
Carving a flower requires several steps. I transfer the flower pattern on a piece of basswood board 1/4 inch (6 mm) thick and use a scroll saw to separate a flower from the board. I use a knife with a straight blade to carve the flower perimeter and several gouges to carve the rest of the flower.
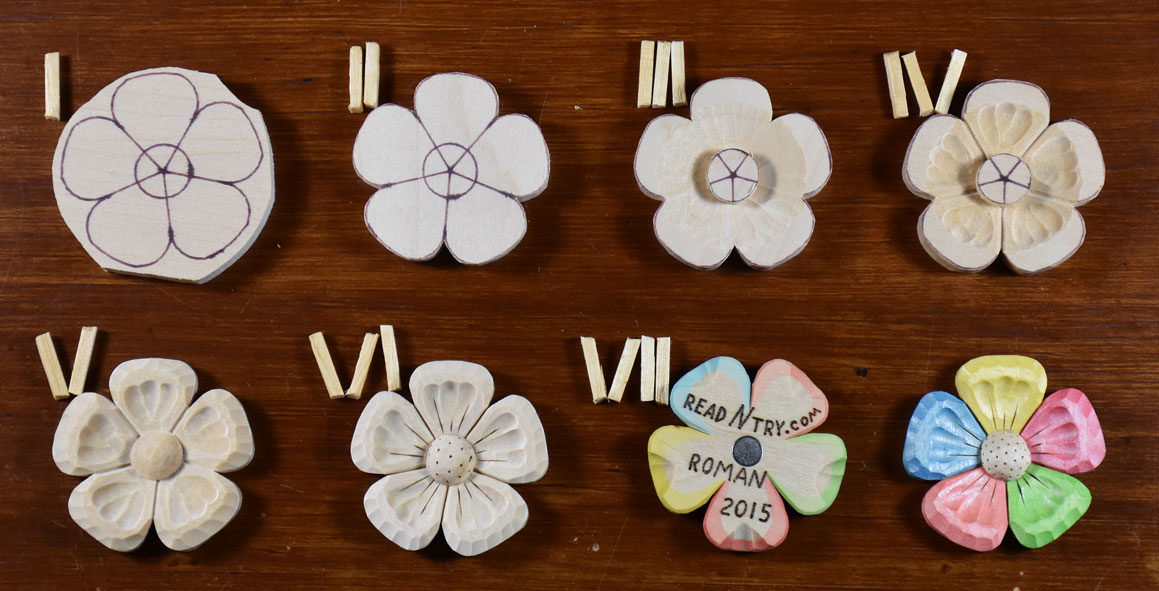
Carving a flower may be a little challenging because of the wood grain. The goal is to carve five identical petals but every petal requires different cuts against the grain to achieve the same petal shape. True, with this carving project I am forced to cut against the grain sometimes but that just challenges me a little – never stops.
I use a knife, three gouges, and a V-tool during the flower carving. Everything is done using hand tools; power-assisted tools are used only for drilling a small recess for a magnet and sometimes for branding on the back (manual or laser engraving).
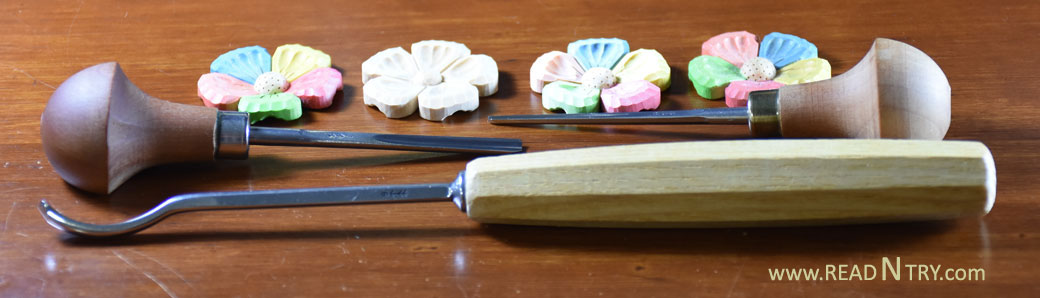
I use a drill press with a Forstner bit 1/4″ (6 mm) to drill a hole so a rare earth magnet fits well. I used to glue magnets before but found that glue sometimes fails over time. Epoxy became my choice to embed rare-earth magnets or pin hardware into my carvings.
I use acrylic paint diluted with water to paint each petal. I try painting several flowers at a time to save time on cleanup and context switches. Sometimes I leave the flowers unpainted and use an oil finish to highlight the wooden grain.
It takes me 2-3 hours to make a flower. Half of that time I spend carving and the rest on branding, painting, and finishing. It takes a few minutes to make a paper box — the packaging makes the carving more presentable.
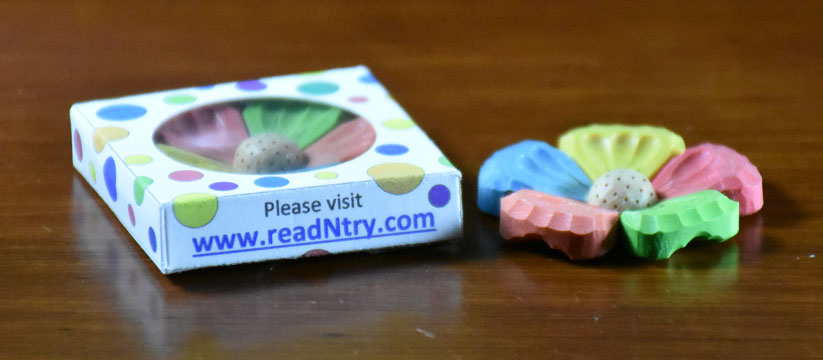
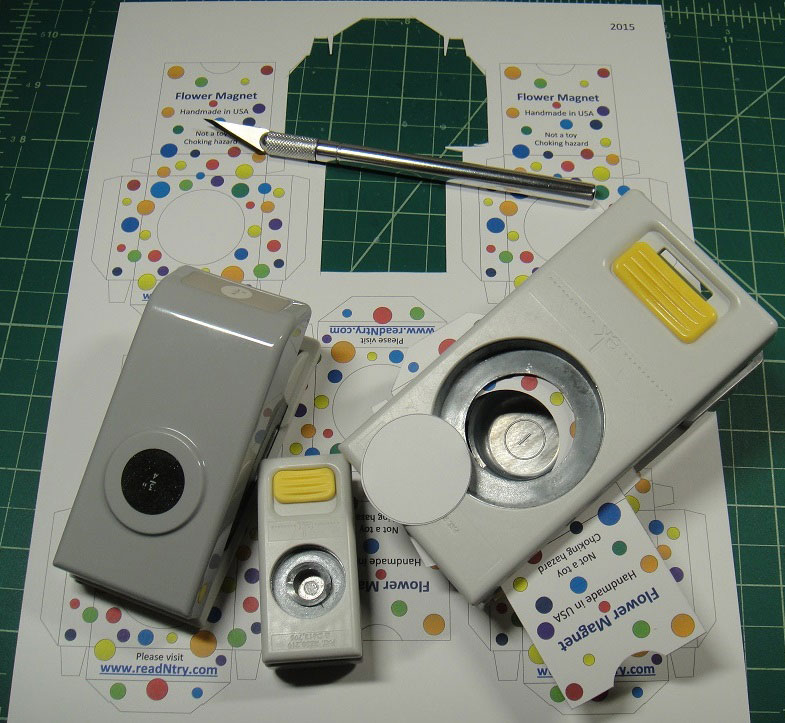
I print the blueprint of six boxes on a sheet of thick paper. Cut them out on a cutting mat – it is pretty fast and easy as the lines are straight. After that, I bend the sides and glue them together.
Carving these little flowers is very relaxing. At the same time, this project is challenging enough to perfect carving wood grain in various directions; still, it is a quick wood carving project. If you would like to carve this flower here is my free wood carving pattern:
At the end, these finished flowers make perfect personalized gifts.
And if you got your magic flower, make a wish and enjoy! Happy carving!
Leave a Reply