Chip-carving is a very simple way of carving a flat or slightly curved wooden surface that produces faceted chips. Chip carving has been known for thousands of years but very few really old wooden pieces survived to these days as wood deteriorates with time relatively fast. Even now woodworkers often decorate their projects with chip carvings of geometric patterns or free style figures such as birds or flowers. In this post I will describe how sketch a chip carving practice board and share a few traditional chip carving patterns.
Chip carving is not difficult. It requires using very few tools and learning just a couple of cuts. Chip carving makes a good and rewarding hobby for a person of any age. If you have 7-8 years old kid, consider introducing him/her to chip carving. You can start even earlier with carving a whale or a bird from a soap bar with a plastic knife.
Anyone can decorate a cutting board or a wooden box with simple chip carving patterns to make them really stand out. At the same time to achieve the exceptional results constant practice is very important.
Learning Chip Carving
My friend started learning chip carving recently. I decided to design a chip carving practice board for him to help him in that exciting journey. A chip carving practicing board is a great first ever project that every chip carving enthusiast should complete and keep it as a reminder of becoming a chip-carver.
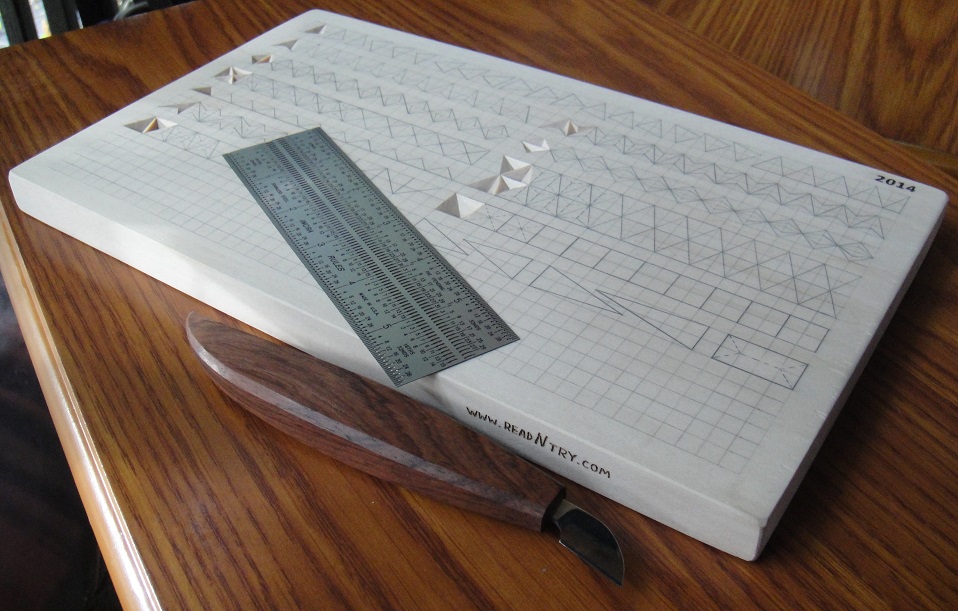
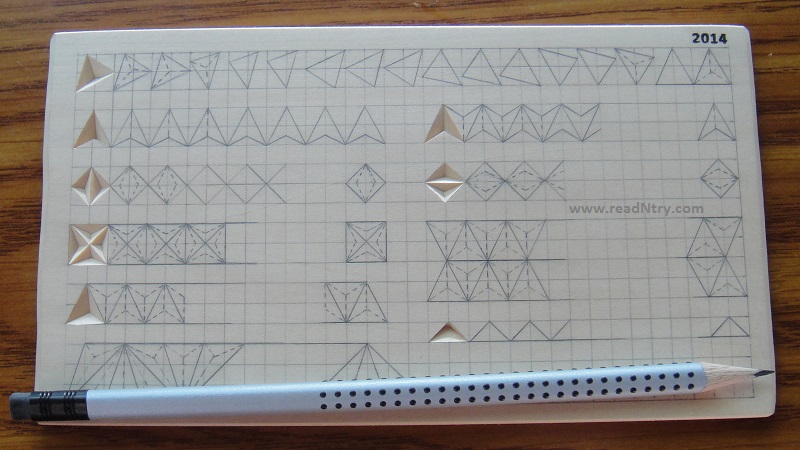
I picked a foot long basswood board (12″ x 7″ x 3/4″, 30 cm x 18 cm x 1.7 cm) and combined several patterns that I learned from masters through the books, the Internet and my personal experience. I drew geometric patterns on one side of the board. These patterns progress in the complexity from top to bottom. This board is designed for cutting not only the simplest three-corner chips but also for cutting advanced four-corner chips and making vertical cuts as well (see the second and sixth rows).
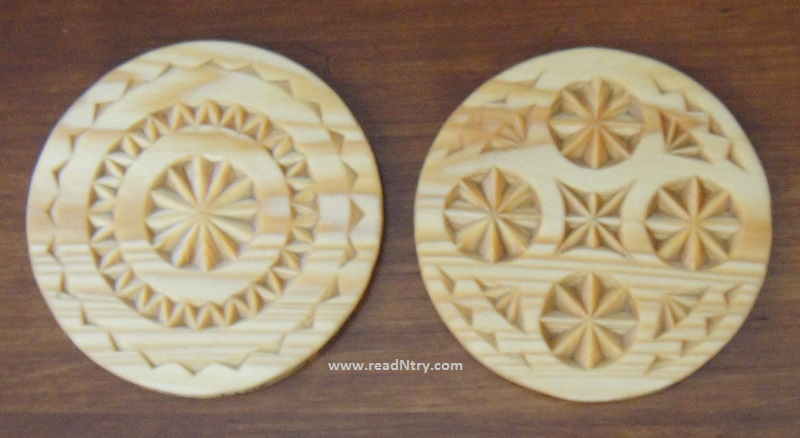
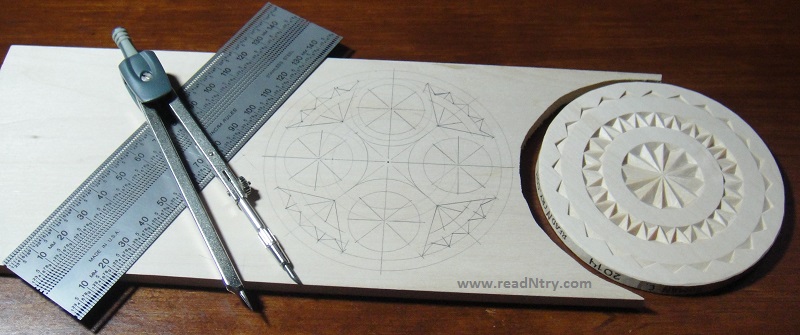
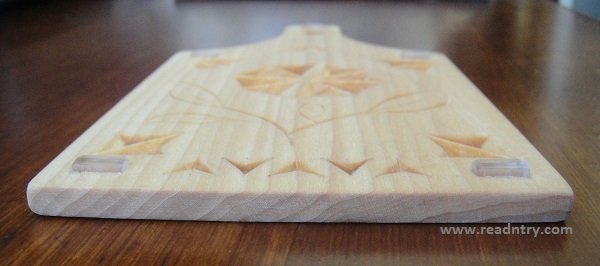
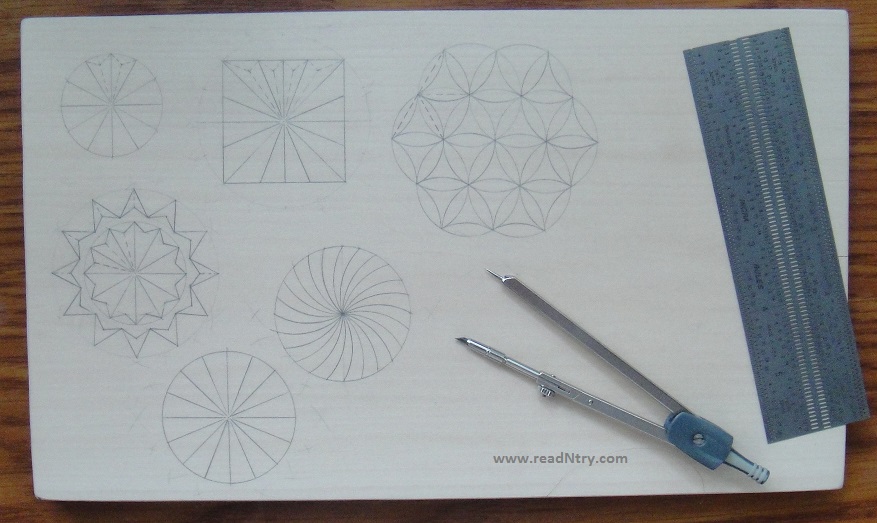
The other side of the board is for carving rosettes – round figures with a central point (usually but not always). I drew these rosettes using a drafting compass and a ruler. Both sides of the board still have enough empty space for additional patterns to experiment and practice.
Chip Carving Tips and Tricks:
• Keep your knife sharp. To check the sharpness of your knife, push the blade on the edge of a piece of paper without any friction or slicing movement. A sharp knife cuts paper easily — the dull blade jams and tears paper. Keep in mind that cutting paper dulls the knife very quickly so don’t overuse this testing technique. Strop is your friend. Note for non-carvers: this test is not applicable to kitchen knives unless you are a sushi Chef. 🙂 Strop is a peace of leather (usually glued to a piece of wood) with a sharpening compound on top to polish a knife blade)
• If a chip is large enough it may be easier to remove it by removing a smaller chip within that larger chip first. Than removing the original chip is much easier since the pressure of inserted knife relieves inwards.
• When removing a chip in a cluster of other chips do the first cut close to the other removed chip. Than do the other two cuts.
• Another way of removing a triangle chip easier is to do three vertical cuts on the lines where facets meet, than cut facets. I guess it is an old, easy and kind of traditional way of doing chip carving. I think that is called as Old-World-Style chip carving. I used it before and now I avoid it. If you would like to excel in chip carving, learn to control the cutting angle perfectly and this technique will not be needed. This technique is good for kids, beginners and people who used to do that for removing complex chips.
I hope my friend will enjoy this practice board. Chip carving is a nice and simple way to beautify wooden projects as well as a relaxing, calming and satisfying experience. Read my article about simple chip carving patterns.
UPDATE: Nov 4th, 2014
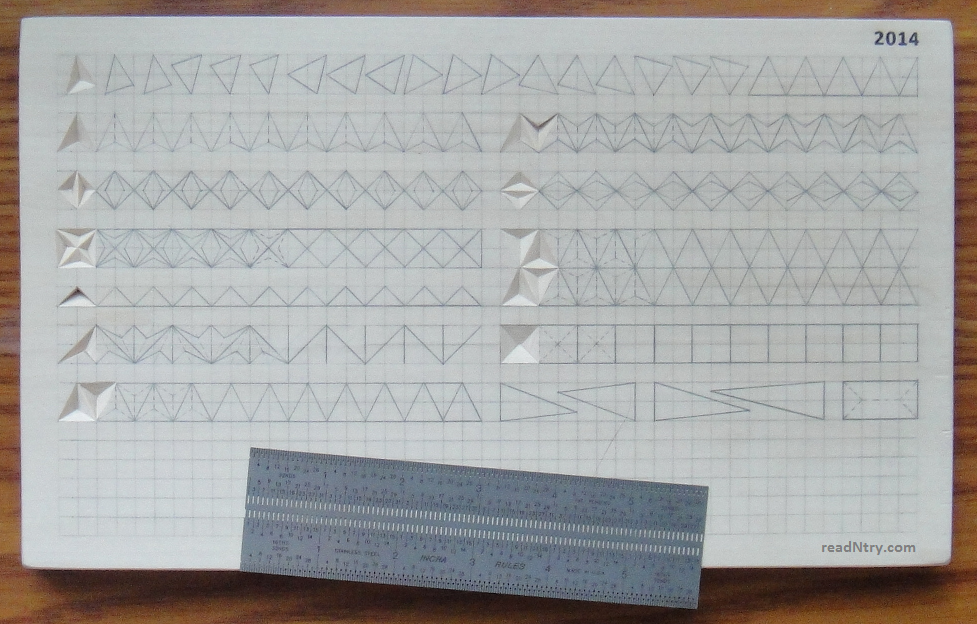
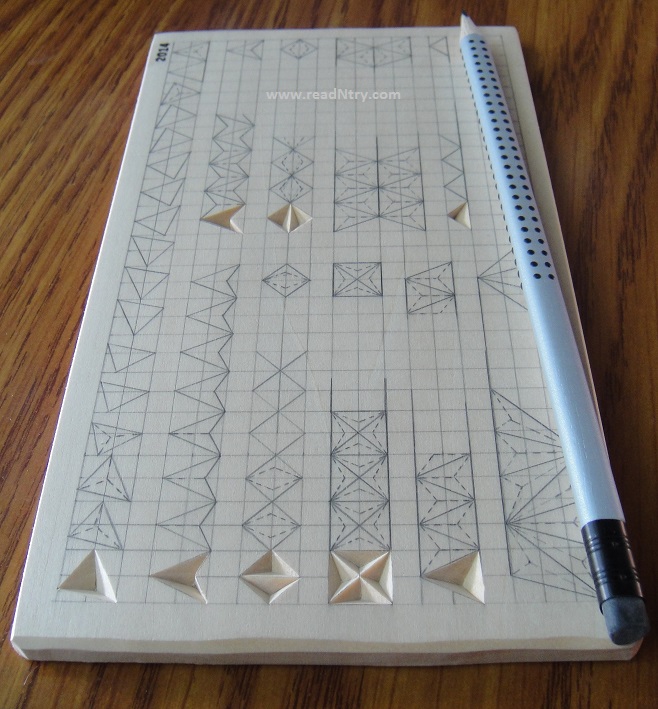
In less than a week another friend decided to learn wood carving and here you go — a new chip carving practice board. This time it is a smaller basswood board – just 7” x 4” x 1/4” (18 cm X 10 cm X 6 mm) with similar chip carving patterns. The grid size is a little smaller (3/16” or 5 mm) to make the carving easier. As you can see this practice board has gaps in the patterns. That is intentional. That helps to learn drawing patterns precisely – the paramount skill in chip carving.
UPDATE: Feb 15th, 2017 — Tips for drawing patterns by hand:
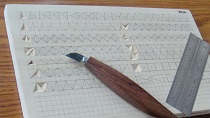
I think it is important to learn drawing the patterns manually. This will help to experiment and to design unique one-of-a-kind master pieces. Here are some tips: draw a grid using a pencil and a ruler. Every cell in the grid should be a square with the side from 3/16” to 1/4” (4 – 6 mm). Connect some cell corners with other cell corners as you wish generally trying to get triangle shapes no bigger than 2-3 cells. Each triangle can be carved as a three corner chip. Generally smaller grid leads to smaller triangles/chips that are easier to carve.
Sometimes I make a grid with square cells using MS Excel; print the grid on paper and use a pencil to arrange my triangles by hand without a ruler. This helps me to design and to prototype the patterns quickly before drawing them on wood with a ruler.
Drawing rosettes is a little more difficult, as it requires a drafting compass and special techniques to split circles in 5, 6, 8, 12, etc. equal parts. Drawing rosettes manually may look overwhelming but it is actually easy if you learn a couple of tricks. Some chip carving books provide a step-by-steps techniques of splitting circles and drawing rosettes. The biggest challenge for me working with a drafting compass was to avoid deep needle holes from the compass but I am getting good at it nowadays. 🙂
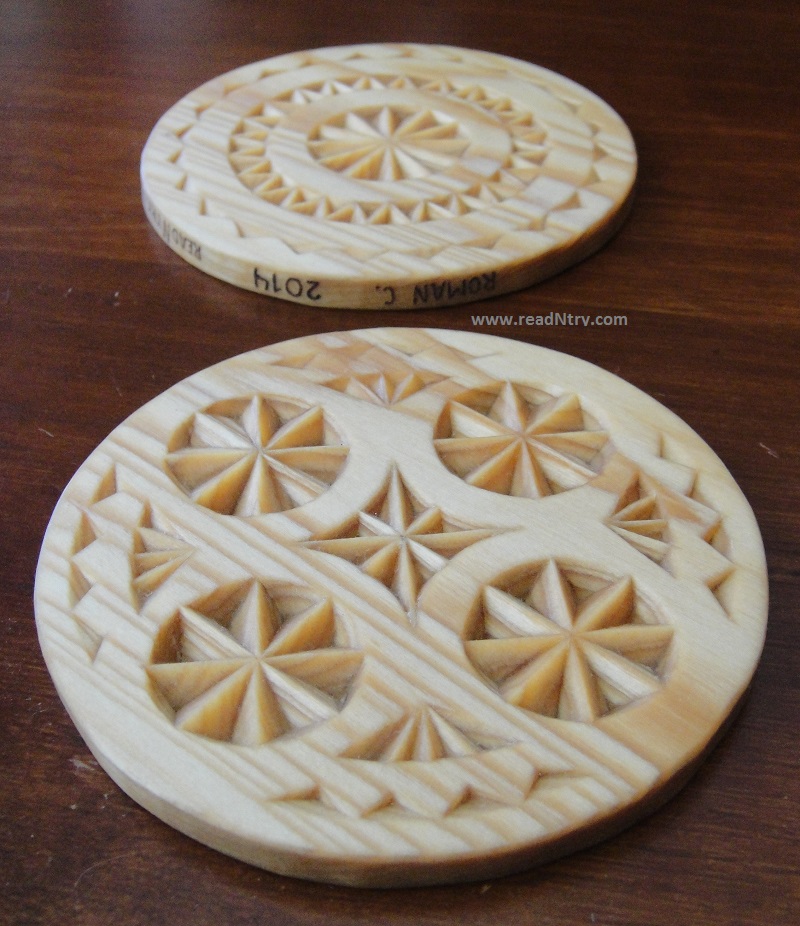
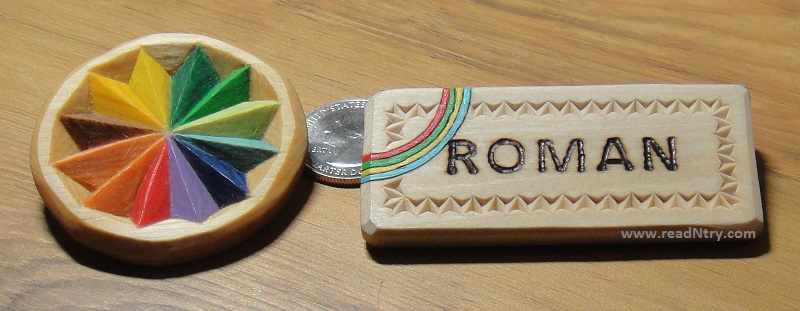
UPDATE: Feb 19th, 2017 — Romans chip carving practice board
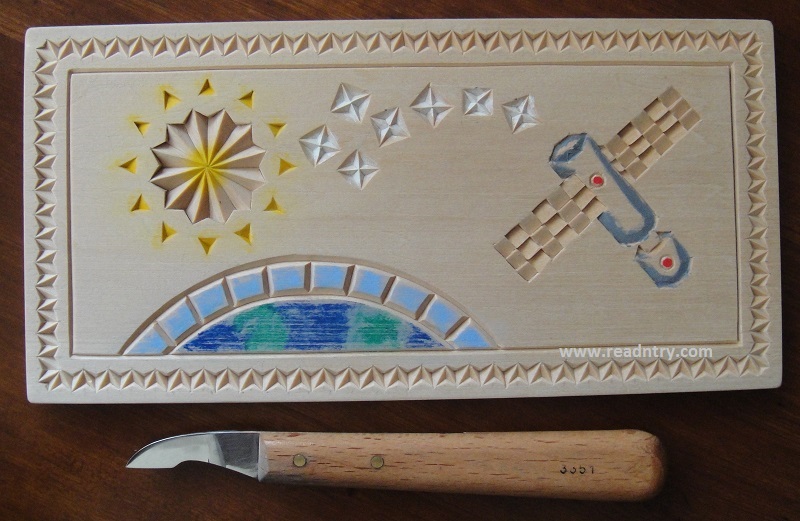
I carved several chip carving practice boards over the last few years. Let me share my recent board. It is 4 x 8″ (10 x 20 cm). This board features classic chip carving patterns with 3 corner chips. The last two rows on the left are 4 corner chips and three corner chips with two vertical sides. The bottom right of the practice board features area covered with a grid so it is easy to quickly draw any pattern there to experiment. You may buy a new practice board with the same patterns from my online store. Click on the picture below to zoom in if you enjoy finding little chip carving mistakes 🙂

I also designed a rosette chip carving practice board. It is also 4 x 8″ (10 x 20 cm). This board features different rosettes, rings, shells and an air balloon patterns. Most of the chips in the patterns are 3 corner chips. I am planning to carve this rosette chip carving practice board soon:
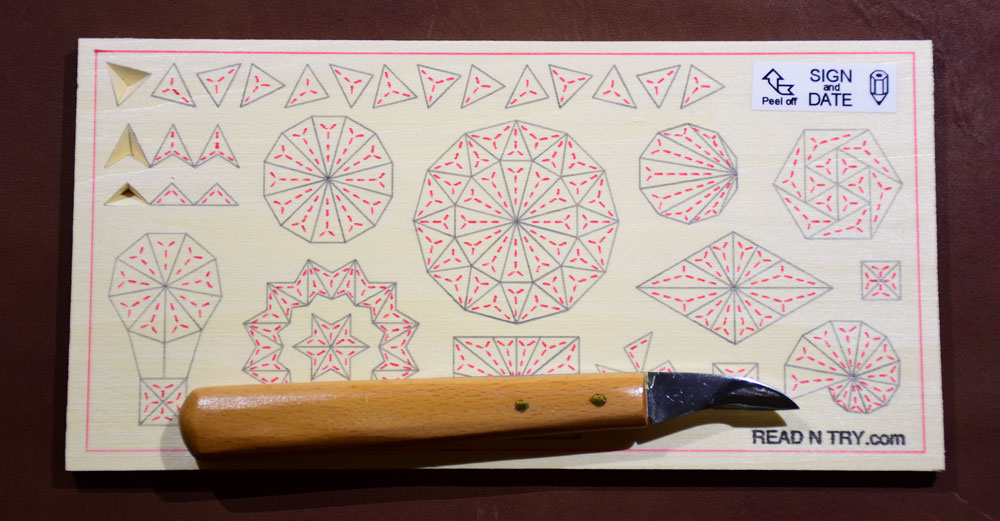
The rosette chip carving practice board is also available in my online store.
UPDATE: May 3d, 2017 — Now you can buy a Chip Carving Practice Board
Now you also can enjoy these chip carving practice boards.
I am glad to offer them to all chip carving enthusiasts. Please visit my online store to buy chip carving practice boards and more. Enjoy!