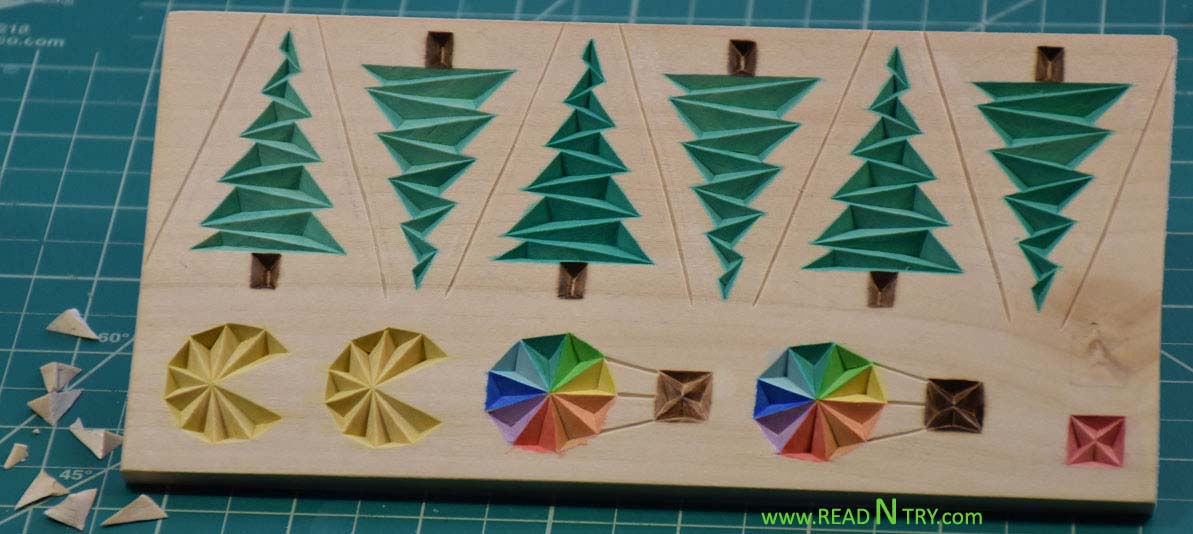
I designed several simple chip carving patterns suitable for making fridge magnets and various ornaments or arranging them into chip carving compositions. These free geometric patterns are part of my “Dozen Chips or So” collection since most of them have just 10-15 chips. Despite the small number of chips, I think these patterns still look nice and balanced. Having fewer chips makes these projects quick to carve. These simple, scalable, printable, and free chip carving patterns suit wood carvers of all levels, including beginners.
Since a larger board is easier to hold while chip-carving, I usually carve several projects on the same basswood board and then cut it with a scroll saw or band saw. Here is an example of carving on one side of a board that is 1/4“(6 mm) thick, so choose a thicker board if you plan to carve on both sides.
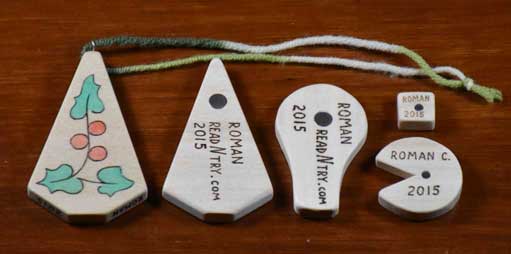
The Christmas tree ornament shows a wood burned and painted decoration and rare-earth magnets inserted and glued into other pieces.
If you want to learn more about chip carving and see my chip carving knife, consider reading my other chip carving articles: Chip Carving Practice Board and Chip Carving Coasters. You can review all my articles about chip carving by browsing the “Chip Carving” category.
Free Chip Carving Pattern: Fir
The Fir chip carving pattern consists of 11 chips, including a rectangular chip for the trunk. I designed this pattern in 2016 and am glad to share it with everyone. I share this chip carving pattern in the public domain — feel free to use and share! Download the Fir chip carving pattern’s PDF file using the button below.
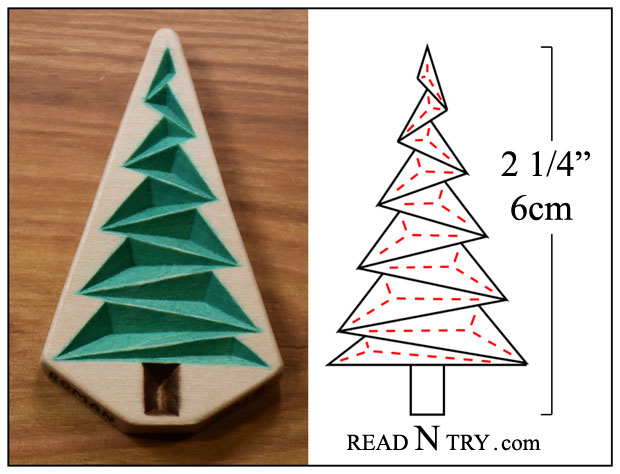
This scalable chip carving pattern is interesting to carve, as the significant difference between the largest and smallest chips makes it a bit challenging. I recommend placing the pattern so that the wood grain direction runs from side to side. It would be more difficult to chip carve the fir if the grain runs vertically.
I use this printable chip carving pattern to carve Christmas tree ornaments. Additionally, I combine this pattern with others to design scenes. For example, check out this Chip Carving Coaster Design: Forest.
Free Chip Carving Patterns: Air Balloon
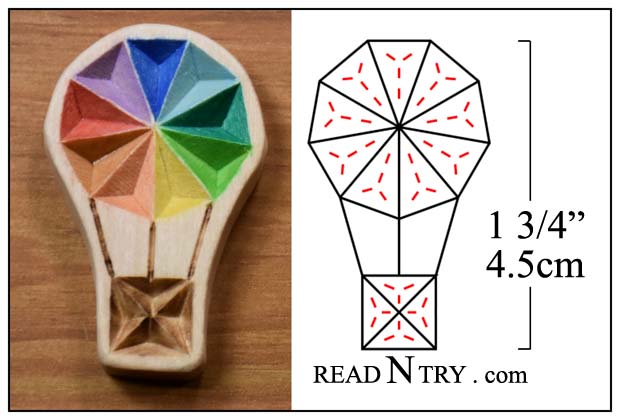
Here is the Air Balloon chip carving pattern. It consists of only 13 three-corner chips. Combining a simple rosette and the diamond patterns makes a new recognizable object – an Air Balloon. The carving may be left unpainted but if you decide to paint your chip carved balloon avoid too watery paint – it can bleed into the neighbor chips.
Free Chip Carving Pattern: Packman
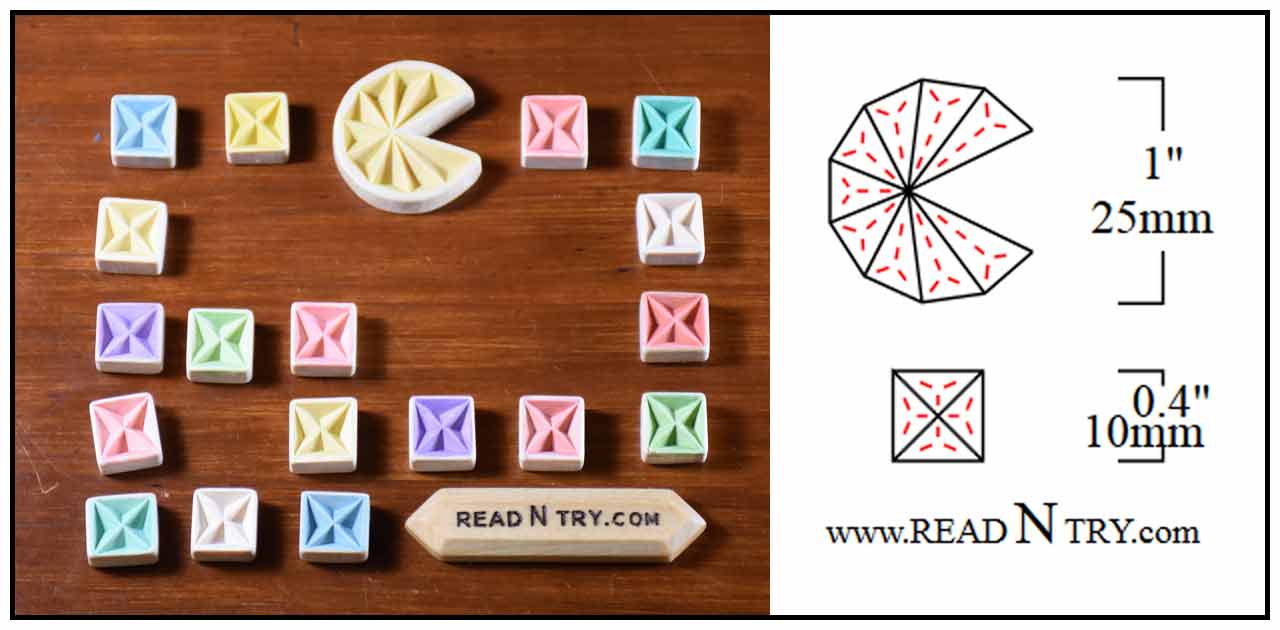
I haven’t played Packman for decades but with this recent chip carving I can’t say that anymore. The “Packman” free chip carving pattern is easy to carve — it has only 9 three-corner chips. The chip carved diamonds are the smallest separate carvings I have done so far.
Free Chip Carving Patterns: Water Wheel
I call this printable chip carving pattern “Water wheel”. It consists of only 12 chips and has two versions: right and left. The center rosette may be left uncarved so that area can be decorated differently.
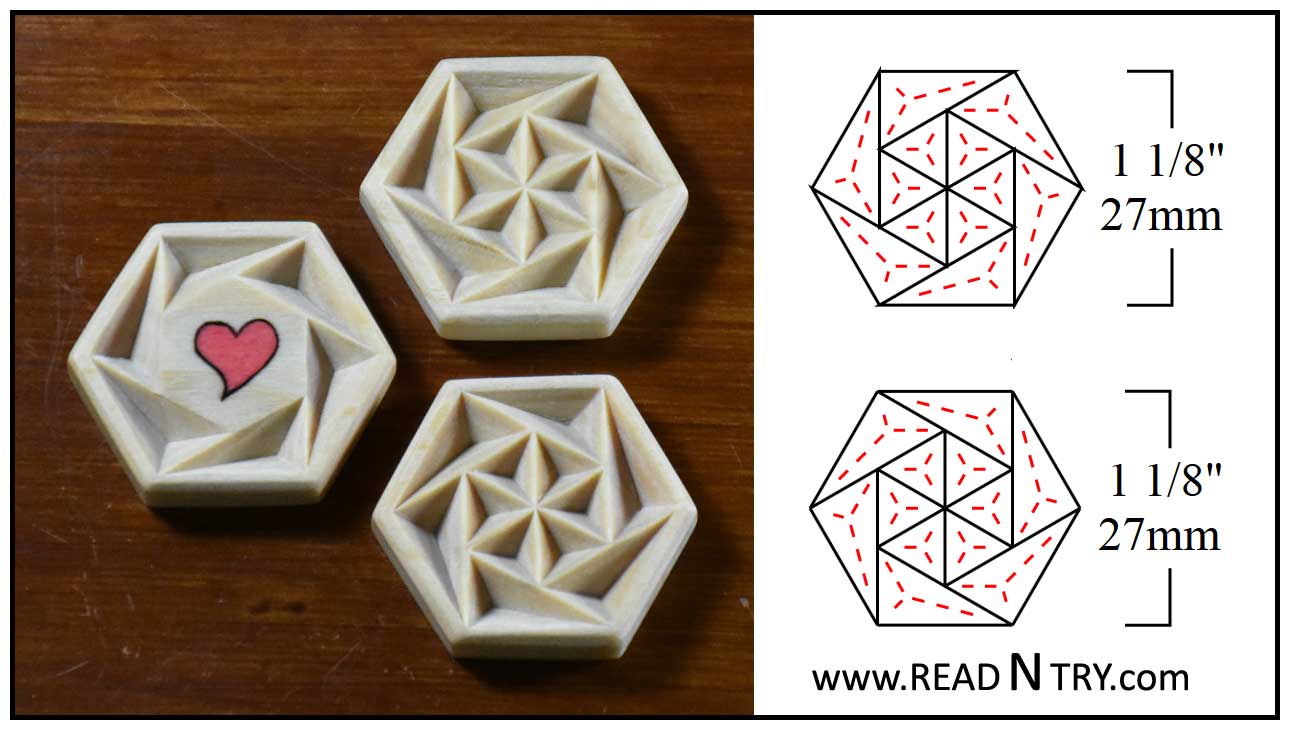
Chip Carving Pattern: Real Diamond
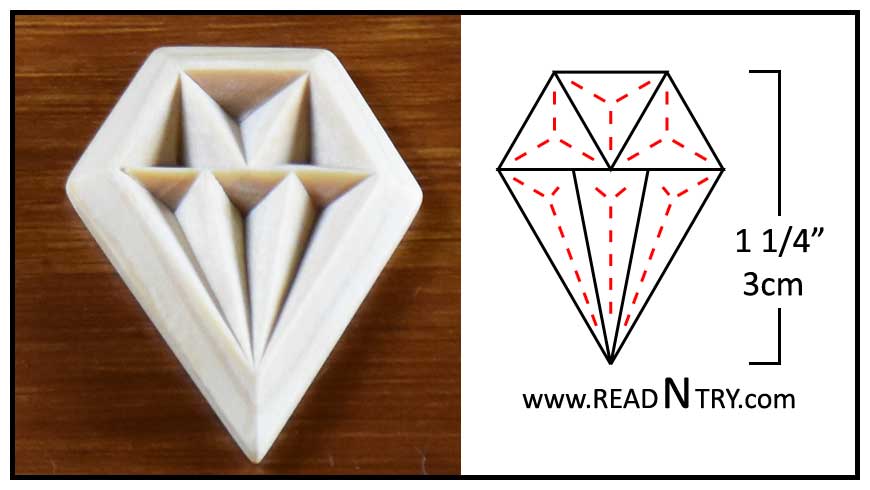
This diamond chip carving project is only six chips away. Try to experiment with the grain direction for this free chip carving pattern; transfer the diamond chip carving pattern horizontally, vertically, or diagonal to the wood grain direction.
You may see more free chip carving patterns on the READ N TRY Pinterest board. If you tried any of these free chip carving patterns please send me a picture of your carving.
Happy carving,
Roman
Find my collection of Free & Useful Chip Carving Patterns here.
Update 2017-01-29:
I painted fir trees in different shades of green and, unexpectedly, achieved an interesting effect on the dark green tree when some wood dust stuck to the “branches” during the final sanding (see the picture below). I also like a tree without any painting. Here is my little forest:
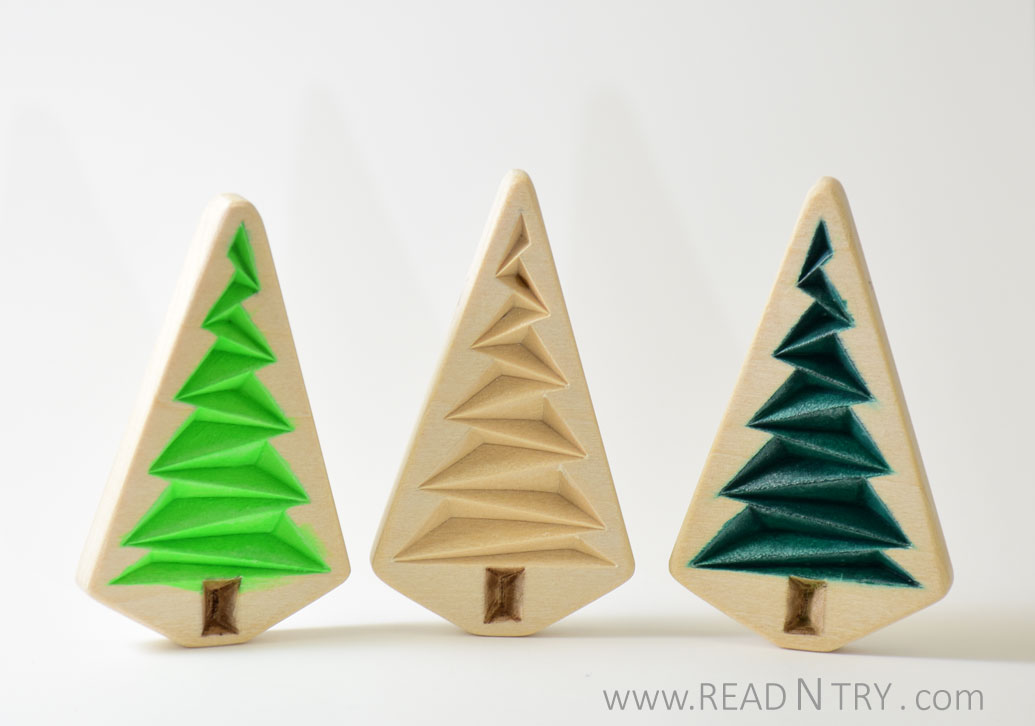
Painting is challenging as it is important to keep the paint from bleeding outside of the chips. I use a small, flat, skew-type brush — I found it suits reaching deep, sharp corners well.
I got another idea: next time I carve this tree pattern I am going to carve the branches first, paint the entire tree on all sides, and then carve and paint/shade the trunk. This way painting should be very fast. I wonder how would it look.
Leave a Reply