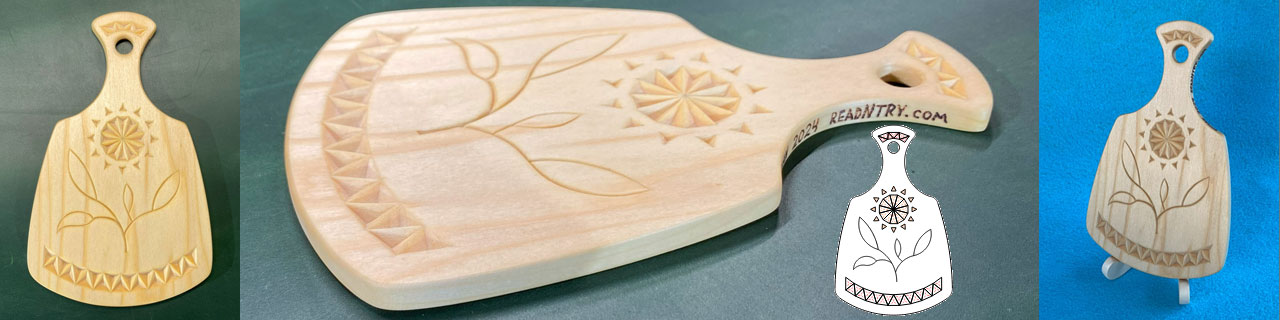
I designed a simple yet elegant chip carving pattern to make a chip carved serving board, perfect for enhancing your kitchen or dining table. I began by selecting my favorite cutting board shape from the designs featured in my article DIY Cutting Board Designs and Patterns. Next, I combined geometric chip carving elements with a freestyle chip carving design to create this unique pattern. The uncarved background (negative space) makes this pattern approachable for both beginners and experienced chip carvers.
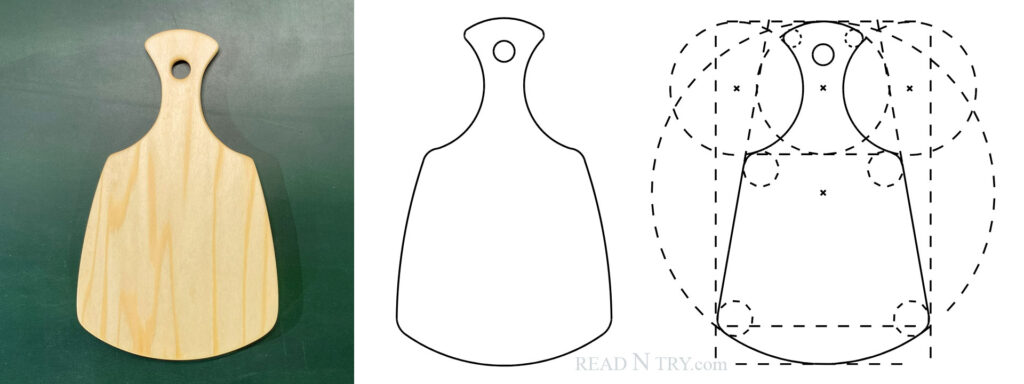
I selected a shape for the serving board. Read DIY Cutting Board Designs and Patterns for more cutting board shapes.
Wood Selection
Basswood is the ideal choice for chip carving, whether you’re a beginner or an expert. Its softness makes it easy to carve, while its fine grain holds small details well. Butternut is another great option, offering a softer texture with a richer, darker grain for added visual interest.
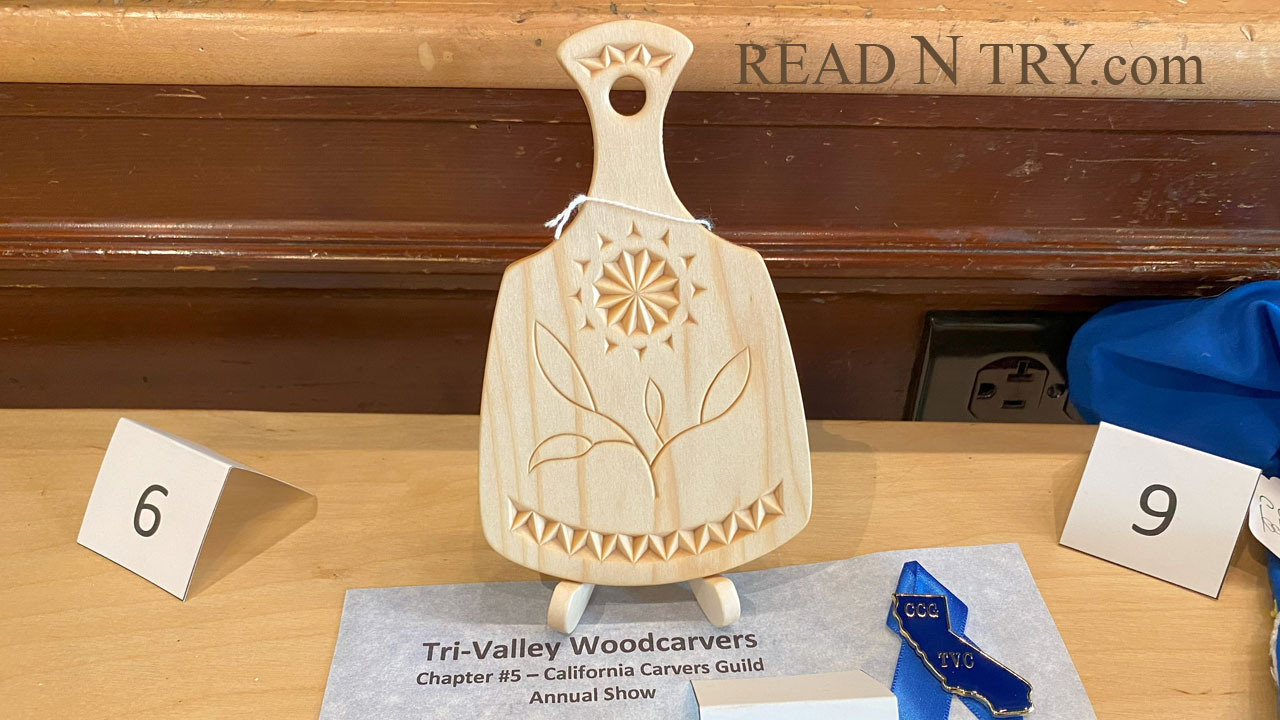
Winning Design: Chip Carved Serving Board
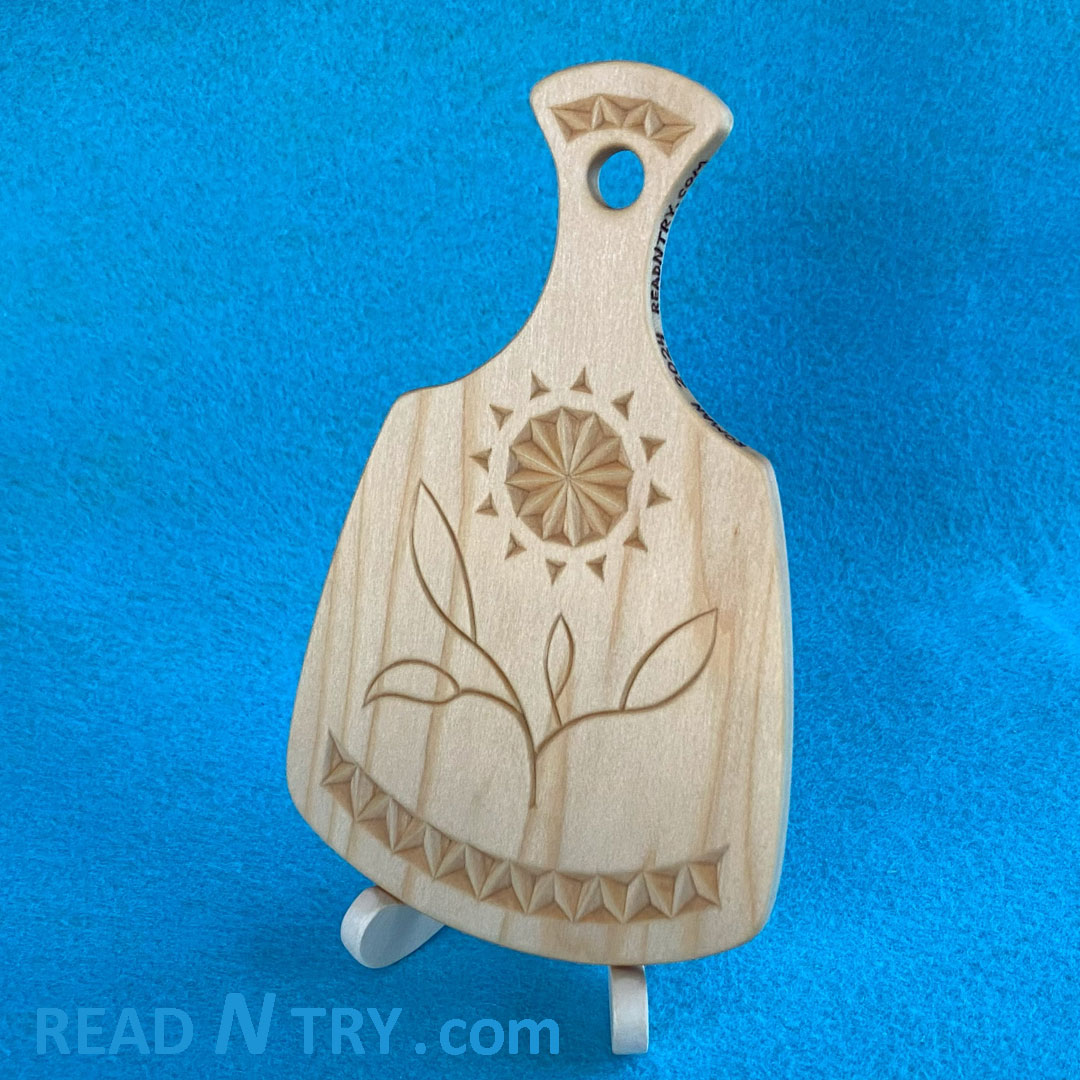
I was thrilled to win the blue ribbon (first place) for this project at the 2024 Tri-Valley Woodcarving Show!
This serving board measures 6” (15 cm) in length and is finished with walnut oil. The design combines geometric and freestyle chip carving patterns, arranged to enhance the natural beauty of the wood on one side of the board.
Typically, I avoid using oil finishes on chip carving projects because they tend to make the wood grain too prominent, which can distract from the intricacy of the pattern. However, with this piece, the abundant uncarved space provided a unique opportunity to highlight the well-spaced grain lines of the quarter-sawn basswood. The result is a nice balance between the carving and the wood’s natural texture.
The wooden grain highlighted by oil finish almost resembles sun rays, complementing the Life Under the Sun pattern and adding an extra layer of charm to the design.
Chip Carved Serving Board Sizing
The Life Under the Sun pattern is designed to fit a 4 x 6 1/4” (10 x 16 cm) board. Ensure the grain runs along the length of the board to prevent the handle from breaking under stress.
Board Thickness:
- For a cutting board, choose a thicker board, such as 1/2” (12–15 mm) or more, to handle regular use.
- For a serving board, a thinner board of around 3/8” (1 cm) works well.
- While you can carve on very thin boards (1/4” or 6 mm), they are more prone to cupping or twisting. To prevent warping, check out my article on Avoiding Board Warping (Cupping and Twisting).
If you scale the pattern, be sure to adjust the board thickness to maintain strength and stability.
Free Chip Carving Pattern Download
This free PDF includes the serving board shape and the Life Under the Sun chip carving pattern. You can easily scale the pattern using Adobe Acrobat Reader’s print dialog.
Feel free to personalize it by replacing the freestyle portion with your own designs to create a completely new look.
Read and Try, Create and Share!
This chip carved serving board is small but practical — I use it to serve cheese and apple slices. While it’s too thin for cutting, the intricate carving adds a delightful charm to my kitchen.
If you enjoy this pattern, give it a try! Whether you’re a beginner or an expert, I’d love to see your progress and photos of your finished projects. Share your comments or questions below to connect with other carvers. Let’s celebrate the beauty of chip carving together.
Happy carving!
Roman
Leave a Reply