The highest-quality basswood is used to manufacture these chip-carving practice boards. This board includes multiple classic Old-World-Style chip carving patterns that require vertical cuts on two sides of a chip. This board can be carved using both modern and old-world styles of chip carving with your regular chip carving knife. This board is great for advanced and experienced chip carvers. We pre-carve examples so you can see how different chips should be carved. Click on the image below to enlarge the pattern.
$19 | Free Shipping within the US
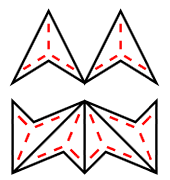
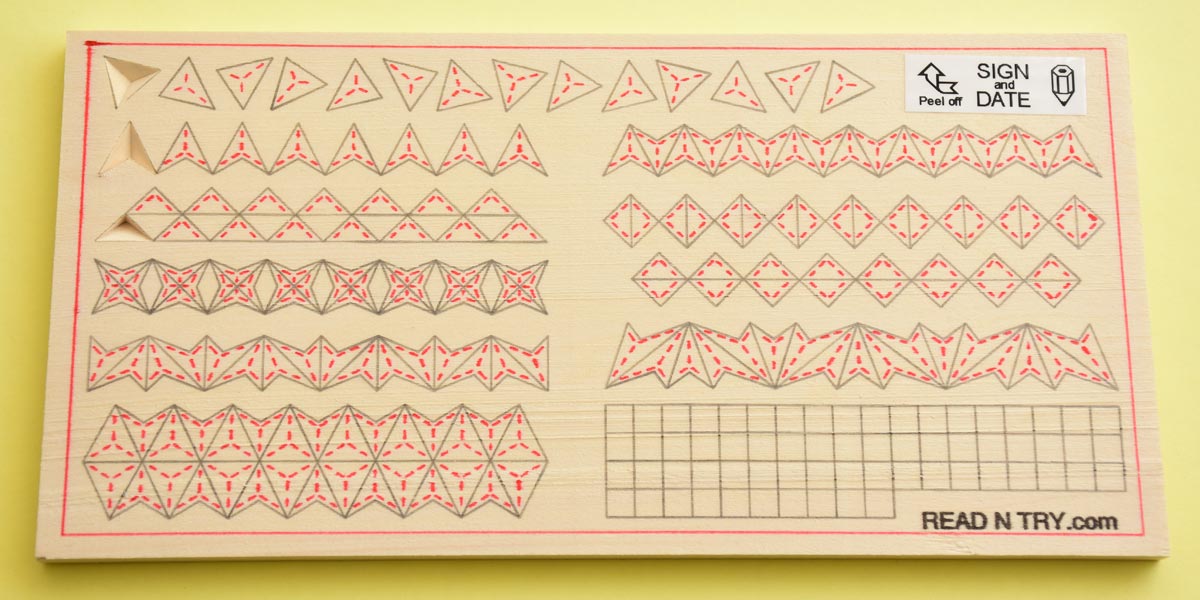
The board features mostly 4-corner chips arranged in various ways; these are traditional chips used in the old-world style of chip carving, in which vertical cuts are made on two sides of the chip. The board also includes standard 3-corner chips on top, so you could “feel” the board. The last pattern on the left shows how 3-corner chips and 4-corner chips can be combined.
Notice how the chips with vertical cuts are drawn: the dashed lines are placed very close to the solid lines of the chip borders on the internal side of the chip to indicate vertical cuts. These cuts are done by holding a chip carving knife vertically, about 90 degrees to the board. Experiment with the vertical cuts by holding the knife at 85, 80, or 70 degrees, so they become almost vertical, to achieve different effects.
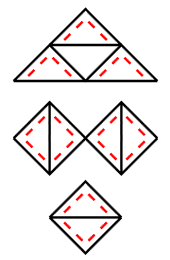
The third row of patterns features an interesting kind of chips: three corner chips where two sides are done using vertical cuts. These traditional chips are relatively easy to carve; they have a unique play of light and shade. Not sure what the right English name for those chips is, but the Russian translation is “Splitters” (“Сколыши”).
Board Size: 4 x 8 x 1/4″ (10 x 20 x 0.6 cm). The practice board is 1/4″ (6 mm) thick; it is designed for carving with angles up to 65 degrees. With the steeper carving angles and/or undercutting, it is possible to cut through the board; use solid material under the board while carving to avoid accidents. I found that the board thickness is perfect for avoiding and unlearning a heavy undercutting habit/mistake. The board includes a grid area at the bottom right. You could repeat some existing patterns there or draw a new design or two to practice more.
The board surface is flat but not sanded; you may see some very minor tool marks from a thickness/surface plainer. If a surface is sanded, the wood fibers retain some of the abrasives from sandpaper, which may dull a chip carving knife faster; therefore, I don’t usually sand the boards. Please contact me at learn@readNtry.com if you would like to place a custom order for a sanded practice board.
I transfer the patterns using a computerized plotter-like machine to achieve ultimate precision. A regular mechanical pencil controlled by a machine is used to draw the chip triangles (so it is easy to clean up), and a red pen is used to highlight the middle dash lines.
Don’t forget to sign and date your practice board; it may be helpful when you find it decades later. Read a story about how the chip carving practice board project started, tips, feedback, comments, and see examples of carved practice boards.
Leave a Reply