
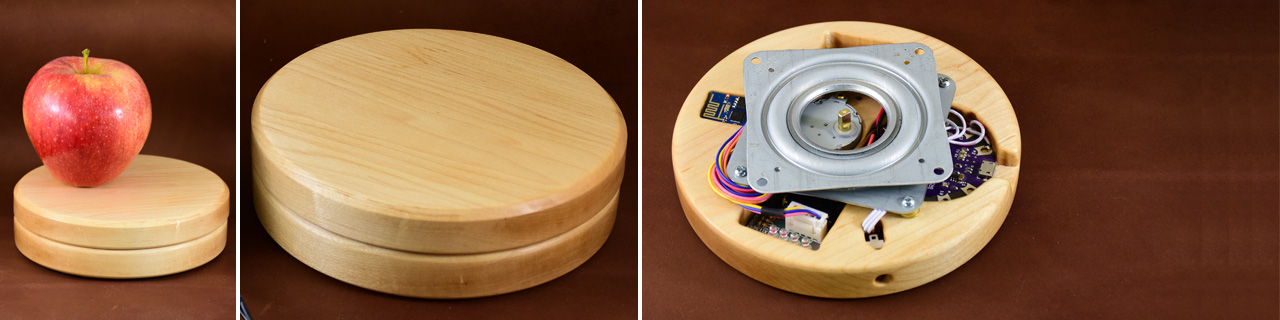
Meet my personal assistant, Lazy Susan, which I built and programmed this year… to keep the trend of 2016 🙂 It is designed to handle up to 200 pounds (90 kg). I built that robot using maple, steel, copper and some other fifty elements mentioned in the periodic table. It is 5″ (13 cm) in diameter; height is 1.5″ (3.5 cm).

I call it Susan. My internet-connected personal assistant is not very smart — it does exactly what I want without any chance of spying on me — but I didn’t want to call it dumbwaiter. So, Susan it is. Unfortunately my round assistant turned out (yes, I used a lathe to turn the chassis) to be a little lazy but I call it a feature, not a bug.
My Internet-connected Lazy Susan can serve me food, show the time, display my wood carvings rotating them continuously, as well as other things. It can do whatever a stepper motor can do. Also it can stay perfectly still on the order or when the power is off and the built-in rechargeable battery gets empty. It can autonomously perform at full speed up to 2.5 hours on a full charge.
I can control it using my iPhone (or any network-enabled device) with a simple HTML+JavaScript interface.
These pictures show “under the hood”. The micro USB cable is used for charging. The little hole in the base on the right picture is a hidden button to turn it on/off.

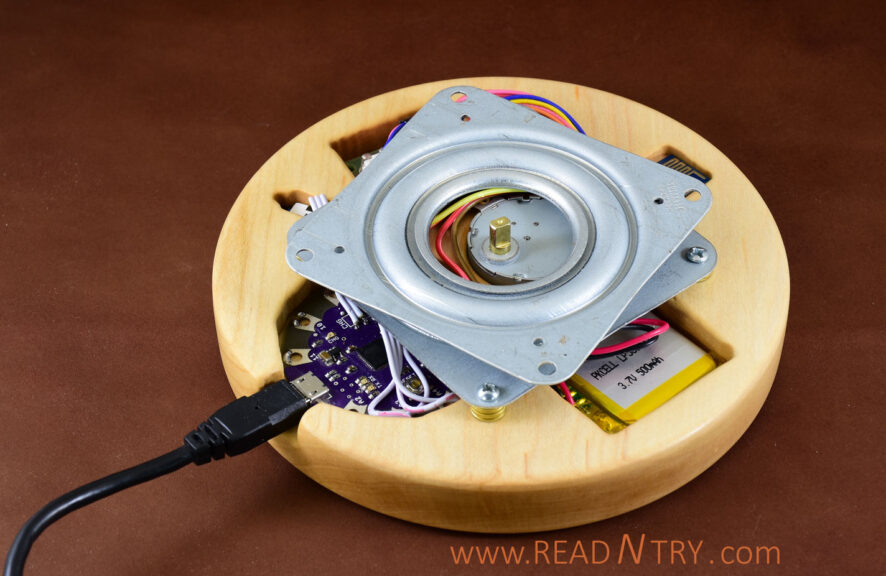
Components:
- Maple 0.75″ x 5.5″ x 12″ (2cm x 14cm x 30cm)
- Arduino LilyPad USB
- ESP8266 ESP-01 Serial WiFi Wireless Transceiver Module
- Lithium Ion Polymer Battery 3.7V 500mAh
- Stepper Motor
- Stepper Motor Uln2003 Driver Board
- Push-and-lock switch
- Lazy Susan Bearings, 3″ (7.5 cm)

I believe all the components cost me ~$60 including wood, screws and wires. The most expensive parts were the LilyPad USB and ESP8266 when I bought them for $25 and $14.50 in 2014. Now, in 2017, they are available for a lot less. With the current prices the component list, I believe, may cost $37.

I built this robot because I needed to make videos of small items from all sides by turning them around. I bought a readily available rotating base online, it worked OK, but I was not very happy with it: it turns only clockwise, it was a little noisy and slow (only 1 rpm) — it would make my videos too long. Also it must use a power cord all the time to perform. My Lazy Susan can operate without a charging cord for some time; that makes it more suitable for my photo sessions.
The project’s challenges:
* Arduino documentation was not exactly correct. It says that the SoftwareSerial on LilyPad USB works on all digital pins. It took me some time to figure out that only some PINs are suitable.
* I needed to connect the external “Charging/On” switch but the board does not provide any PINs for this use case. I ended up removing the built-in switch and soldering wires to the external switch very carefully.
* Sanding wood is always a challenge. It is important to use quality sand paper and go through every grit progressively to remove all tool marks and sanding scratches.
Lack of documentation for ESP8266 ESP-01 is not a challenge these days. I was able to start a simple webserver on the chip and it greatly simplified the setup. I would like to thank Igor Fonseca Albuquerque for his post: Wi-Fi Controlled FPV Rover Robot. It helped me to resolve some of my ESP8266 challenges.
Overall it was a very enjoyable little project. Literally, Susan helps quickly turning around any thing I need silently up to 4 rpm. I enjoyed building software to meet my own requirements.
Ok, Susan, let’s turn something up! Enjoy this short video:
UPDATE 2017-01:
I received many questions about the project. Here are the things I would suggest to keep in mind if you decide to build a similar project:
* Try to avoid using a WiFi module – it complicates the project unnecessary. Aside from the “cool factor” I have not found a use case yet for controlling the lazy Susan from far away. Having one or several buttons would be more reliable, secure and just simple.
* If your use case does not require a built-in battery it could simplify the design.
* Using the “Arduino LilyPad USB” micro-controller is actually overkill for this simple project. I used it because I have many of them lying around.
* The stepper motor I used is rated for 5V but the other electronic components work with 3.3V. That affects the motor torque. The max load the motor could turn with this design is only 2.5lb (1.1kg).
* I considered using a continuous rotation servo instead of a stepper motor. The control would be much more precise with the servo. The stepper motor won due to its quietness.
* The design can be applied to a small diameter lazy Susan. To support larger diameter it is better to use some kind of gears.
Another way to achieve similar functionality cost-effectively is to turn a fancy cover for a rotating base that is available in stores for about $10.
Leave a Reply